Scratch-building for beginners - page 7
If you cut the chimney openings in the roof sections correctly, the Tichy chimneys should be a perfect - maybe even a tad snug - fit. But fit is only half the challenge; we also need to
comnsider fashion.
|
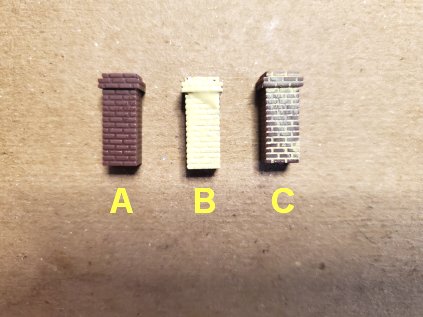
In the above picture, figure A is a Tichy chimney as it comes from the manufacturer. Figure B is the chimney slathered with Americana-brand acrylic craft paint, available in 2-ounce bottles from Michaels. I used a color called Desert Sand, but I don't believe that particular color is in Americana's palette any longer. A suitable replacement is Camel, although any color resembling the color of mortar is acceptable. Whatever color you choose for the "mortar", slather it on well on all four sides of the chimney, being sure to get the paint into all the brick joints. Figure C is the chimney after the excess paint has been wiped off with a DRY paper towel, rubbing gently so as not to pull the paint out of the joints (wait about 10 seconds after applying the paint to wipe the chimney off).
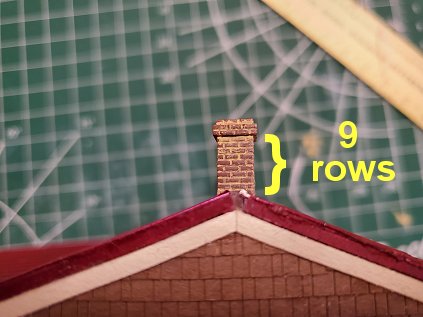
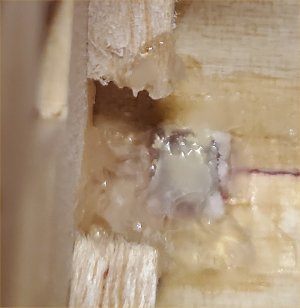
Cement the chimneys in place with super glue by inserting each chimney into its respective hole (it doesn't really matter which one goes where) until there are only 9 courses (rows) of bricks above the peak of the roof; only a small length of chimney will extend into the house. Now apply a glob of super glue around the bottom of the chimney inside the house so the chimney is enmbedded in the glob of glue; when the glue sets the chimney will be set in place.
|
|
NOTE: The Walthers brick sheet is more brown than red; I suggest cutting all pieces to size, then painting them with a brick-red color before proceeeding any further. I also recommend using spray paint to get good, even coverage.
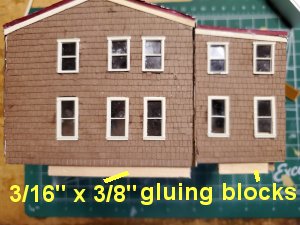
The foundation of the house is made of brick-embossed styrene sheet glued to a wood backing - sort of. Actually, the backing is made of 3/16" x 3/8" strip wood glued along the inside edge of the walls at the bottom, with 1/8" set into the house and 1/4" protruding out of the bottom; the styrene foundation pieces are glued to this 1/4" "lip". Apply "mortar" to the walls using the same method used for the chimneys; do this after cutting the wall sections to size and painting them, bur before gluing them into place.
Since Aunt Estelle's house was built in 1913, it was originally heated with coal; we therefore need to install a window (Tichy 8229) for the coal deliveries. Note that this window isn't shown on the SMP plans since the original blueprints don't show one, but trust me - it's there. I allowed two bricks above the window and two bricks beneath it; this makes the wall 12 bricks high. Since I am setting the scene where a coal delivery is being made, I am gluing the window in with no pane; you can do likewise, or you can install the pane so it is closed - it's your model.
A word of caution: the styrene sheet is really slippery; it is highly recommended that you use a straightedge with a cork backing to reduce slippage - accidents can and do happen, and they're painful!
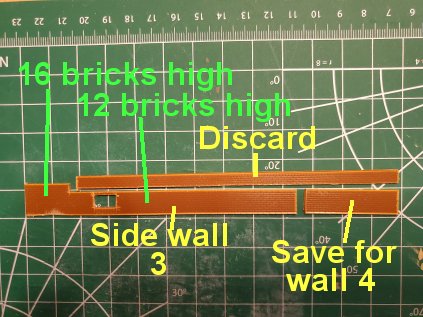
The pieces of the foundation that go beneath walls 3 and 5 (the side walls on the larger part of the house) have a hiccup - they're not simple strips (of course not...that would be easy). They have a "bump up" at the front to form the sides of the porch. To make these side pieces, cut a strip of bricks the height of the front porch and the length of the side of the house plus the width of the porch. Next, cut away a strip of brick that is (again, this gets kinda confusing, so please refer to the picture) the length of the side of the house minus the width and extra height of the porch. Finally, trim the end of the narrower piece to the length of the side of the house. Sand the ends of the wall section to create a mitered edge.
|
|
Use the piece labeled "Save for wall 4" in the picture for the short segments on wall 4. Cut a strip of brick 12 bricks high to go around the smaller part of the house and cut it into the proper-length segments, then apply mortar and glue the segments into place on the gluing blocks.
Use super glue to attach the styrene to the wood gluing blocks.
Next, we get into what may be the absolute hardest part of the project: the front porch.
| Previous | Next |
